VS Code Remote SSH Tutorial
In this tutorial we’ll integrate SSH into VS Code in a way that won’t require entering a password every time.
Troubleshooting on Windows
Visual Studio Code is incredibly wasteful on Windows. The developers have no respect for users'
devices. If one of your devices can’t connect to the remote-ssh server two times in a row without any
obvious reasons, then you should first download VSCode but
before re-installing, remove VSCode from your device including %APPDATA%\Code and %USERPROFILE%\.vscode.
It would be a good idea to either use VSCode’s sync feature or save a copy of your settings.json as well as taking
a note of the extensions you have installed.
After re-installing VsCode, my computer could connect to the ssh-server in 0.5 seconds. In the end, totally worth it since I removed 4GB worth of files related to vscode even after it had been uninstalled from my computer.
Generating an SSH key
If you’re on Windows, you will need to install the OpenSSH feature from Settings or you can use WSL to be able to use ssh-keygen.
You can generate an SSH key using ssh-keygen -t ed25519. Press enter on the prompt to use the default filename.
Keep track of where the key is stored. (e.g. C:\Users\maste\.ssh\id_ed25519)
This will be useful when configuring the Remote-SSH VSCode extension.
Adding SSH key to Authorized Keys
During the process of adding our keys, we’ll have to enter our passwords.
Linux / MacOS / WSL
ssh-copy-id -i path/to/file/if/not/default USER@HOST
# examples
ssh-copy-id USER@HOST
ssh-copy-id -i .ssh/id_ed25519.pub USER@HOST
ssh-copy-id -i /mnt/c/Users/maste/.ssh/id_ed25519.pub USER@HOST
When doing this, press enter to any yes/no prompts such as fingerprints and etc. The fingerprint prompt is important only if you can’t trust your network (e.g. Starbucks WiFi).
If you’re having trouble with this, just cd into the .ssh folder and use -i id_ed25519.pub
Windows Without WSL
If you’re on Windows, you won’t have access to ssh-copy-id. Instead you can modify the first command below or use the second command
if you aren’t doing anything abnormal on your computer.
type path\to\id_algo.pub | ssh USER@HOST "cat >> .ssh/authorized_keys"
# type $env:USERPROFILE\.ssh\id_ed25519.pub | ssh user@host "cat >> .ssh/authorized_keys"
# the above is a helper that hopefully requires no modifications
Setting up VS Code
-
Install the Remote - SSH extension
-
Use the Command Palette (Ctrl + Shift + P) and use the “Remote-SSH: Open SSH Configuration File…” command
-
Select the first path (e.g.
C:\Users\maste\.ssh\config) -
Enter the information for your remote server(s). Here is mine for reference. I had to comment out PreferredAuthentications.
Host uWaterloo User e5lopez HostName linux.student.cs.uwaterloo.ca IdentityFile "C:\Users\maste\.ssh\id_ed25519" ForwardAgent yes AddKeysToAgent yes # ssh -X ForwardX11 yes ForwardX11Trusted yes # Install https://sourceforge.net/projects/vcxsrv/ (XLaunch from Windows Search) # Set USER ENVIRONMENT VARIABLE "DISPLAY" to "localhost:0" # Linux/MacOS: IdentityFile "/Users/USER/.ssh/id_ed25519" # PreferredAuthentications publickey # to set up a ProxyJump see next section -
From the command palette, use “Remote-SSH: Connect Current Window to Host…” and select the host you just added
-
A window will show up asking you to choose the platform for the remote server so choose the remote server’s platform (e.g. Linux)
-
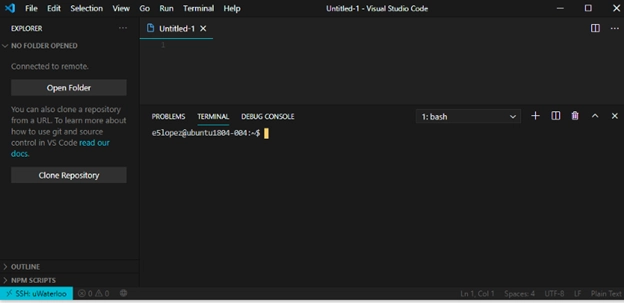
If all goes well, you should be able to connect without having to enter a password

-
Tip: add multiple folders in the remote server to a workspace
Proxy Jump Setup
Suppose we want to SSH into an environment but through another one (proxy) first. To do this in VSCode, we add the following configuration
Host hostOne
    User e5lopez
    HostName linux.student.cs.uwaterloo.ca
    IdentityFile "C:\Users\maste\.ssh\id_ed25519"

Host hostTwo
    ProxyJump hostOne
    HostName ugster504.student.cs.uwaterloo.ca
    User e5lopez
    ForwardAgent yes